As discussed in the Email & Push Notifications section, SendinBlue provides a generous free tier that should be more than sufficient for use with QuestionPulse.
The only downside to this service is the fact that you may need to reach out to support to have SMTP functionality enabled, though it's a very simple process can they can have you approved in minutes by answering just a few questions via their chat/support (they mainly just want to verify you won't be abusing their system for spamming, which you won't be if using the service with QuestionPulse). With that said, for the accounts we've created we have had SMTP features enabled by default on account creation. We will look at how to reach out to get SMTP activated at the end of this section of the users' guide.
To get set up with SendinBlue:
2) Click the "Sign up free" button:
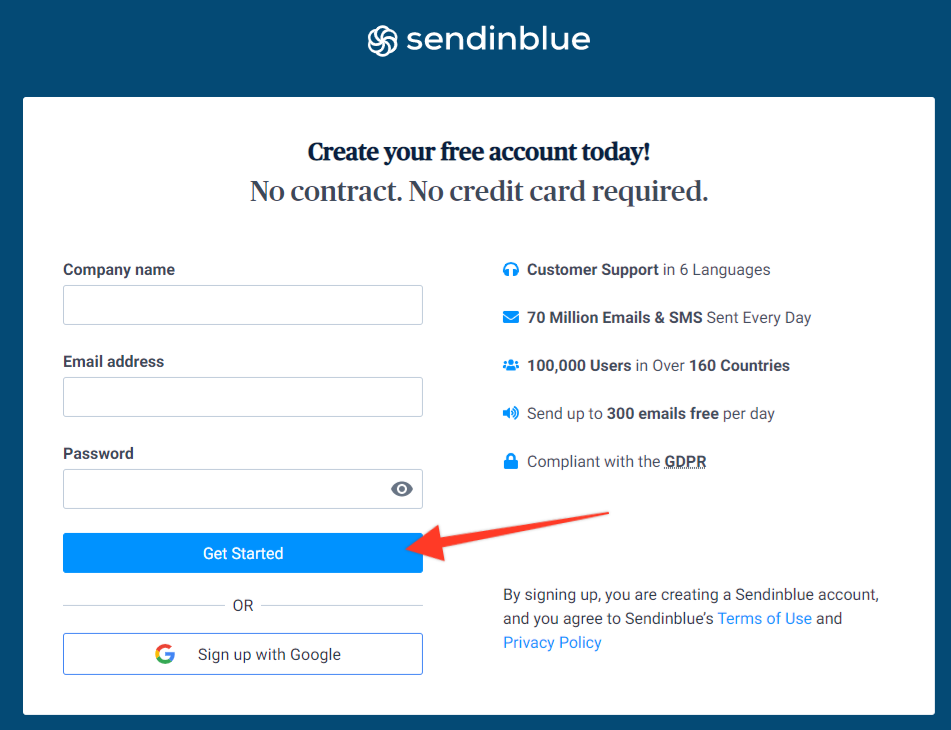
3) Enter the necessary information to create your account and click the "Get Started" button:
4) You will be prompted to verify your email before continuing, so please check the email address you used to register for the verification email and click the link to verify your account.
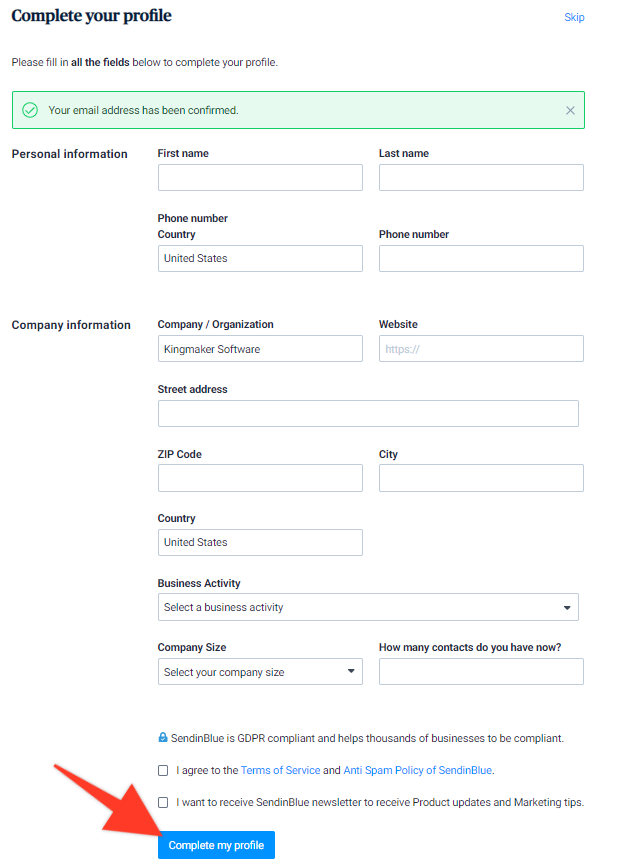
5) Once you've verified your account, you'll be prompted to complete your profile. Please be sure to fill out all of the fields, as they require this information to ensure compliance with international spam and emailing laws.
Note: There's a "Skip" link in the upper right, but if you skip this step you likely won't be able to utilize their SMTP services.
For the "Business Activity" drop down you can choose "Software / SaaS"
For the "How many contacts do you have now?" field you can enter "1"
When completed, be sure to check the "I agree to the Terms" checkbox, then click the "Complete my profile" button:
6) You will be taken to the Dashboard where there are a few more steps to take to fully activate your acccount. You will see a prompt letting you know there are more steps that you need to take to fully activate your account, but these don't need to be completed to utilize the SMTP mailing, so ignore them for now and move to step 7:
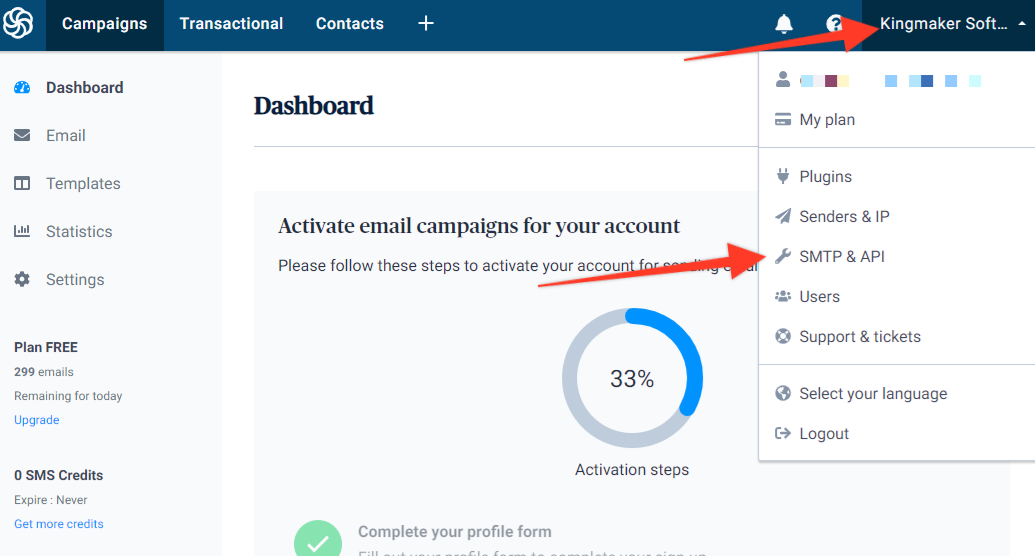
7) Click your company name/personal name (depending on what you entered on sign up) in the upper-right of the top navigation menu, which will open a drop-down menu. Then click the "SMTP & API" menu item:
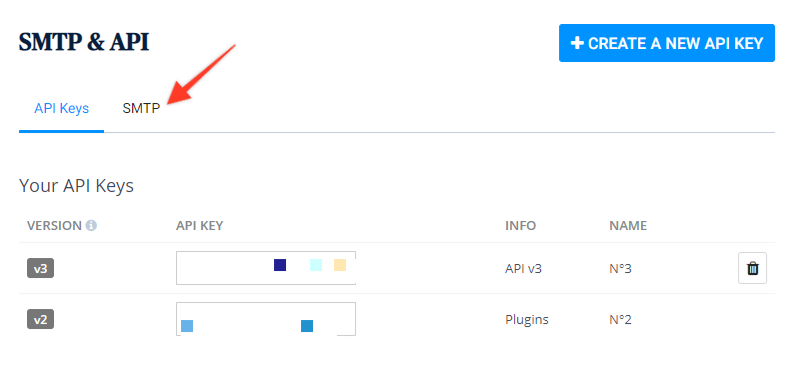
8) From the SMTP & API interface, click the "SMTP" tab at the top:
9) You will be presented with the SMTP information you need to configure QuestionPulse (user name - called "Login" here), password (called "Master Password - SMTP Key Value" here), server, and port information - be sure to note all of this data:
10) Use this data to fill out the settings in the Email Settings interface so QuestionPulse can utilize the SendinBlue SMTP service to deliver emails to you as new questions are found.
Extra Notes:
When using SendinBlue SMTP settings in the Email Settings interface, leave the "Use SSL" checkbox UNchecked. If the "Send Test Email" function in QuestionPulse doesn't work and you've verified all other SMTP settings are correct, try to enable "Use SSL" to confirm that it is not the culprit.
If you receive a notification that SMTP features have not been enabled for your account (though they should be automatically), be sure to check this link for how to quickly reach out and get it enabled. If they ask questions about your intentions to use the STMP services, just let them know you're utilizing an app that sends periodic status email updates (transactional emails, NOT marketing emails) throughout the day, but only a few emails an hour maximum, and all emails sent through the STMP service go to one email address that you own, so there are no issues with spamming or harming their sending IP addresses.
Link: https://help.sendinblue.com/hc/en-us/articles/209463245--How-can-I-get-my-SendinBlue-SMTP-account-activated-